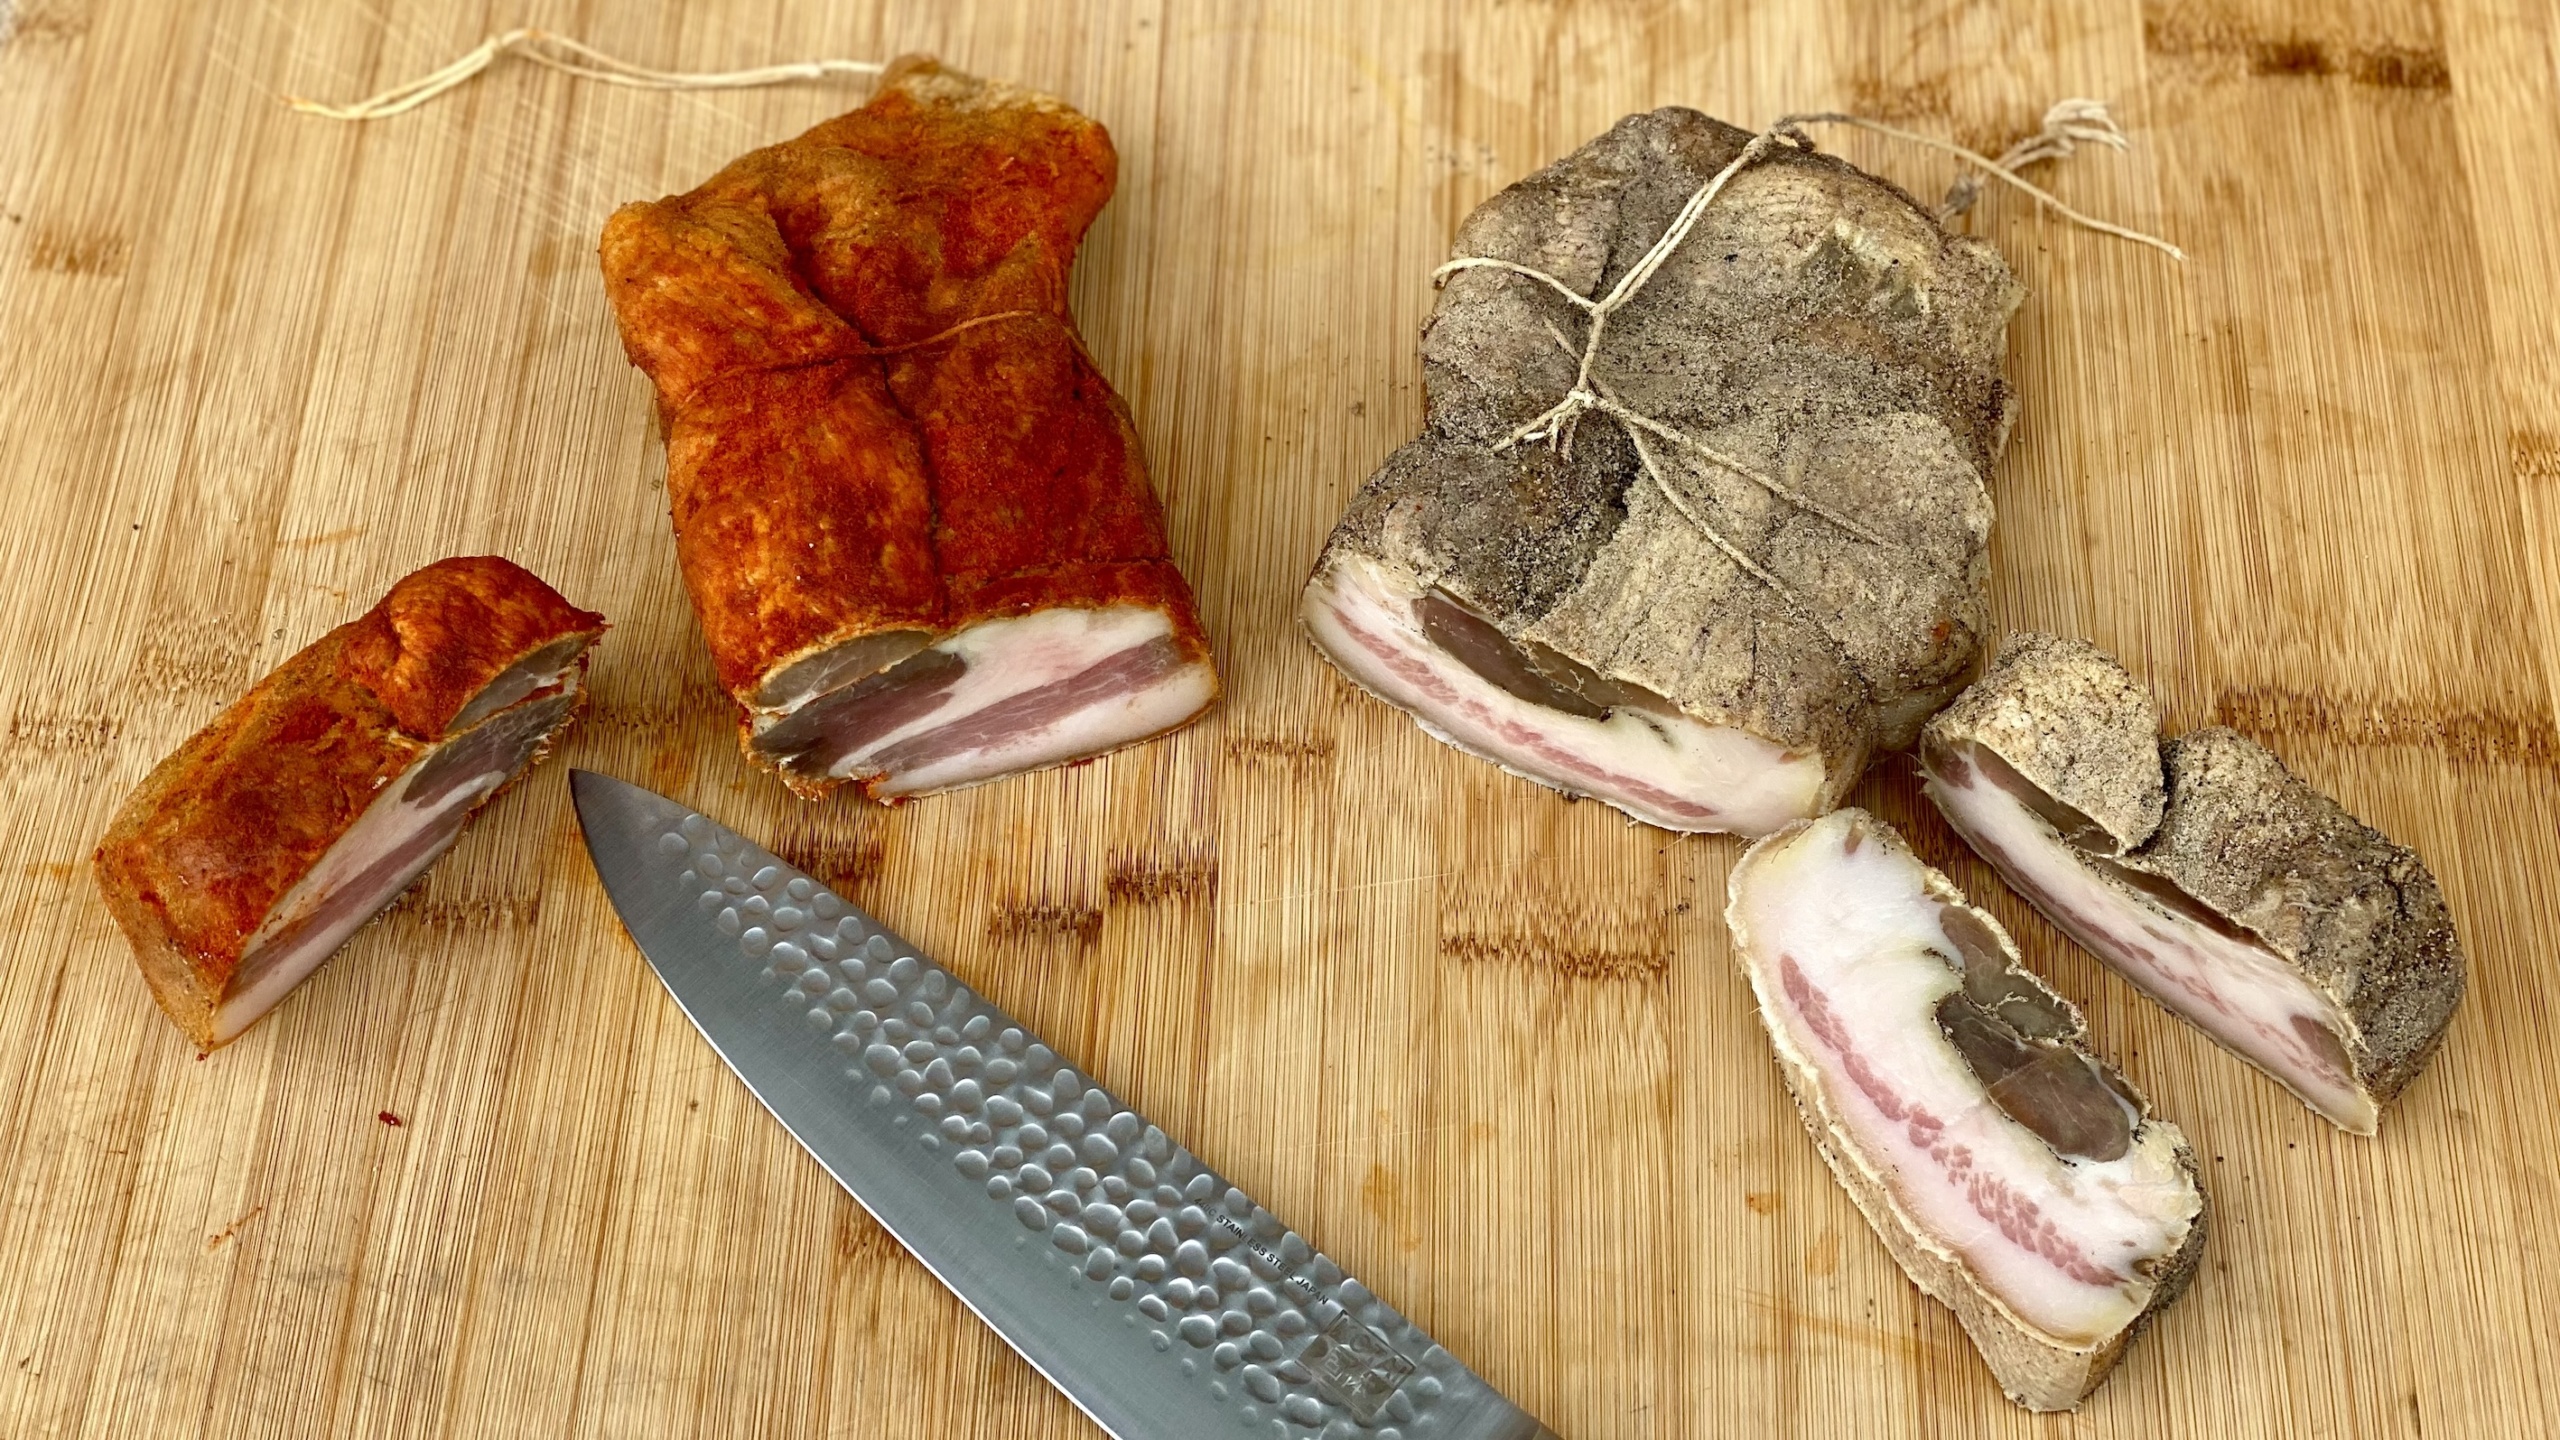
After bacon, “prosciutto violino,” and other typical cured meats, today I’ll be preparing guanciale. Homemade italian guanciale, as the name suggests, is a cut of meat obtained from the cheek and jowl of the pig, with a high fat content. Suitable for pasta dishes like pasta all’amatriciana, pasta alla carbonara, and pasta alla gricia, it has a strong and distinctive flavor.
Now, after this brief introduction, let’s see how to make homemade italian guanciale.
INGREDIENTS
|
PORK CHEEK |
1,5 kg |
|
SEA SALT |
2 kg |
|
BLACK PEPPER GRAINS |
|
|
GARLIC |
2 cloves |
|
JUNIPER |
10 berries |
|
BAY |
4 leaves |
|
WINE |
500 ml |
|
BLACK PEPPER POWDER |
|
|
CHILI POWDER |
INSTRUCTIONS
1) Let’s prepare the italian guanciale homemade by trimming the meat well and removing any excess. You can ask your butcher to do this for you if you prefer.
2) As you can see from the YouTube video, I decided to prepare two pieces with different flavors, so I cut the guanciale into 2 pieces of approximately 700-750 grams each.
3) We’ll crumble the bay leaves, slice the garlic cloves thinly, and crush the juniper berries with a knife. We’ll arrange these flavors on top of our future homemade guanciale, distributing them evenly. Finally, we’ll grate some peppercorns over it, as much as desired.
4) Now, we have two options: if we have a large enough baking dish and adequate space in the refrigerator, we can use the baking dish. Otherwise, we can use a food-grade plastic bag.
– BAKING DISH: Spread some of the salt on the bottom, about half. Place the pieces of guanciale side by side and cover them with the remaining salt.
– FOOD-GRADE PLASTIC BAG: Place some of the salt on the bottom of the bag. Insert the first piece of guanciale and cover it with more salt. Put the second piece of guanciale on top of the first, now covered, and finish by adding all the remaining salt. Close the bag with a knot.
5) Place the bag or the baking dish in the refrigerator for 7 days. If you’ve made a single piece weighing about 1.5 kg, it’s best to leave it in the fridge for about ten days.
6) After 7 days, remove the guanciale from the fridge. Take it out of the salt, remove the flavors and the remaining salt, and clean it well using wine. This step can also be done with water and vinegar if you don’t have wine at home. If you prefer, you can lightly pat it dry with paper towels or a cloth. The piece should not be completely dry but also not too wet… just damp.
7) Make an incision with a knife on the top part of the guanciale so that you can insert some twine and hang the guanciale for aging.
8) Finish by spicing the guanciale. In my case, I made one piece with ground black pepper and one with chili powder. Distribute the spice evenly all around the uncovered part where there’s no skin, so to speak. Tie it securely with twine and hang it at room temperature for about 48 hours. Afterward, move it to the cellar or refrigerator for aging.
The ideal aging temperature is about 10°C.
I recommend weighing your guanciale after the initial 48 hours at room temperature. Why? Because homemade guanciale will be ready to consume when it has lost about 30% of its weight. Generally, it takes 2 to 3 months, but it depends a lot on where you’re aging it, so using weight loss as a measure will help determine the timing.
I hope the explanations are clear; for further information, I encourage you to check out the YouTube video and read the comments where you’ll find more suggestions from viewers.


